
To view this content in our official product documentation, click here.
Introduction
Having installed the Plytix connector, some setup is required before it can be used. You must:
- Stage 1: Create a post-request script
- Stage 2: Apply the post-request script to your Plytix connector
Once this setup is complete, you can add instances for use in process flows.
Stage 1: Creating a post-request script
A post-request script is required to generate an authentication token from the given instance credentials. Follow the steps below to create this script.
Step 1\ From the Patchworks dashboard, select scripts from the left-hand navigation menu.
Step 2\ Click the create script button:

Step 3\ In the name field, type the following:
Plytix Post-Request ScriptStep 4\ In the description field, type the following:
Plytix authorisation post-request script (retrieve token)Step 5\ Click in the language field and select PHP 8.1:

Step 6\ Click the create button.
Step 7\ The script is created and opened in edit mode - select and remove any placeholder code:

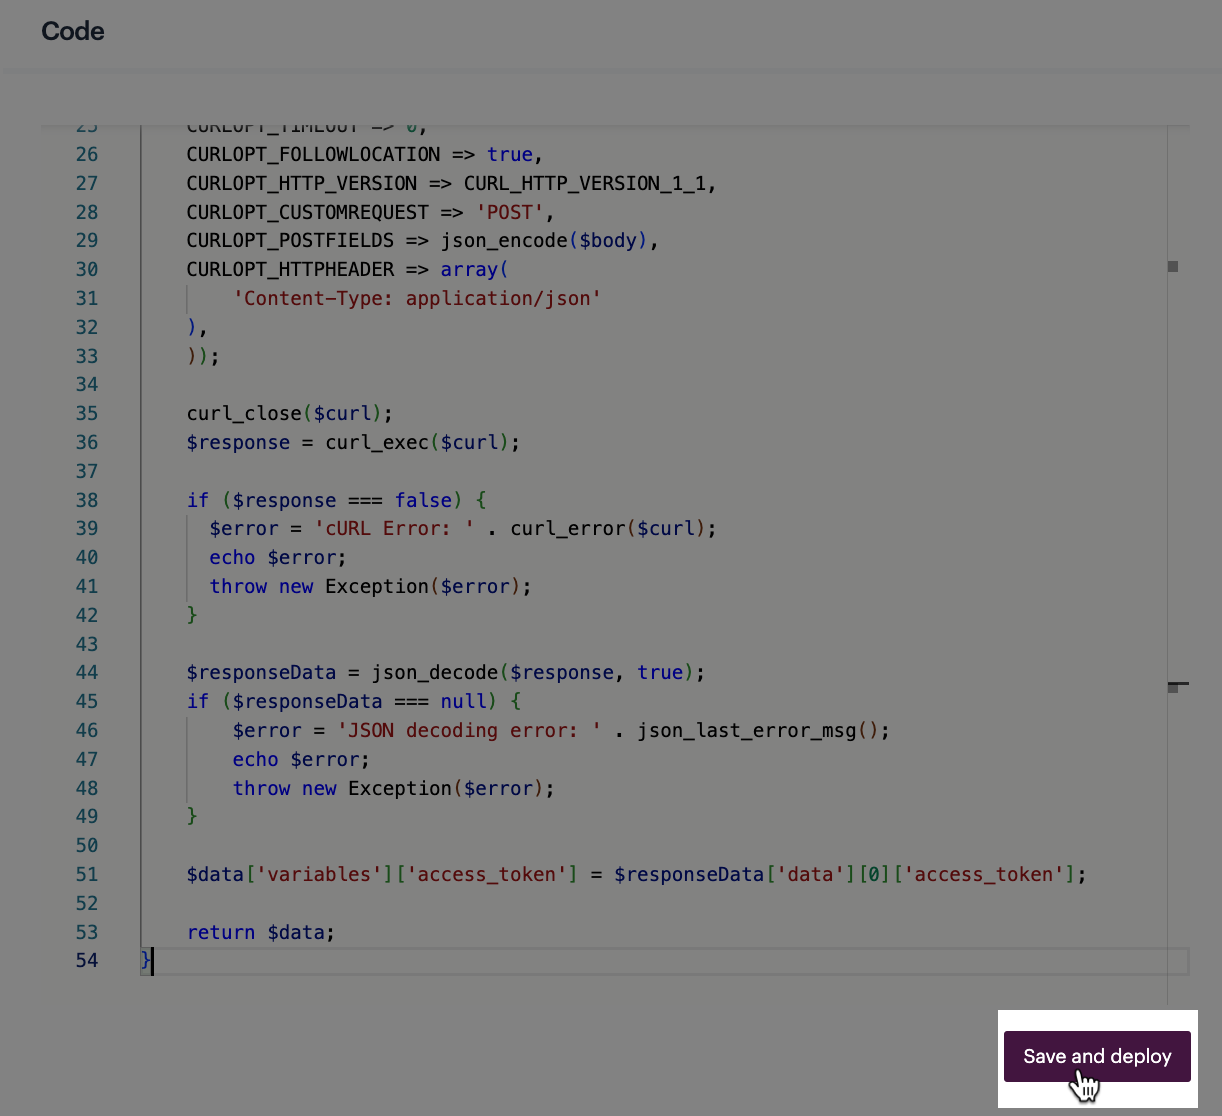
Step 8\ Paste in the code below.
 Post-request script code
{% code lineNumbers="true" %}
<?php

/**
 * Handler function.
 *
 * @param array $data [
 *      'payload'   => (string|null) the payload as a string|null
 *      'variables' => (array[string]string) any variables as key/value
 *      'meta'      => (array[string]string) any meta as key/value
 *    ]
 */

function handle($data)
{
    $curl = curl_init();
    $body = [
        'api_key' => $data['variables']['api_key'],
        'api_password' => $data['variables']['api_password'],
    ];
    curl_setopt_array($curl, array(
    CURLOPT_URL => 'https://auth.plytix.com/auth/api/get-token',
    CURLOPT_RETURNTRANSFER => true,
    CURLOPT_ENCODING => '',
    CURLOPT_MAXREDIRS => 10,
    CURLOPT_TIMEOUT => 0,
    CURLOPT_FOLLOWLOCATION => true,
    CURLOPT_HTTP_VERSION => CURL_HTTP_VERSION_1_1,
    CURLOPT_CUSTOMREQUEST => 'POST',
    CURLOPT_POSTFIELDS => json_encode($body),
    CURLOPT_HTTPHEADER => array(
        'Content-Type: application/json'
    ),
    ));

    curl_close($curl);
    $response = curl_exec($curl);

    if ($response === false) {
      $error = 'cURL Error: ' . curl_error($curl);
      echo $error;
      throw new Exception($error);
    }

    $responseData = json_decode($response, true);
    if ($responseData === null) {
        $error = 'JSON decoding error: ' . json_last_error_msg();
        echo $error;
        throw new Exception($error);
    }

    $data['variables']['access_token'] = $responseData['data'][0]['access_token'];

    return $data;
}
Step 9\ Click the save and deploy button:
Stage 2: Applying the post-request script
Step 1\ From the Patchworks dashboard, select connectors and instances from the left-hand navigation menu to access your installed connectors.
Step 2\ Find your Plytix connector and click the settings icon.

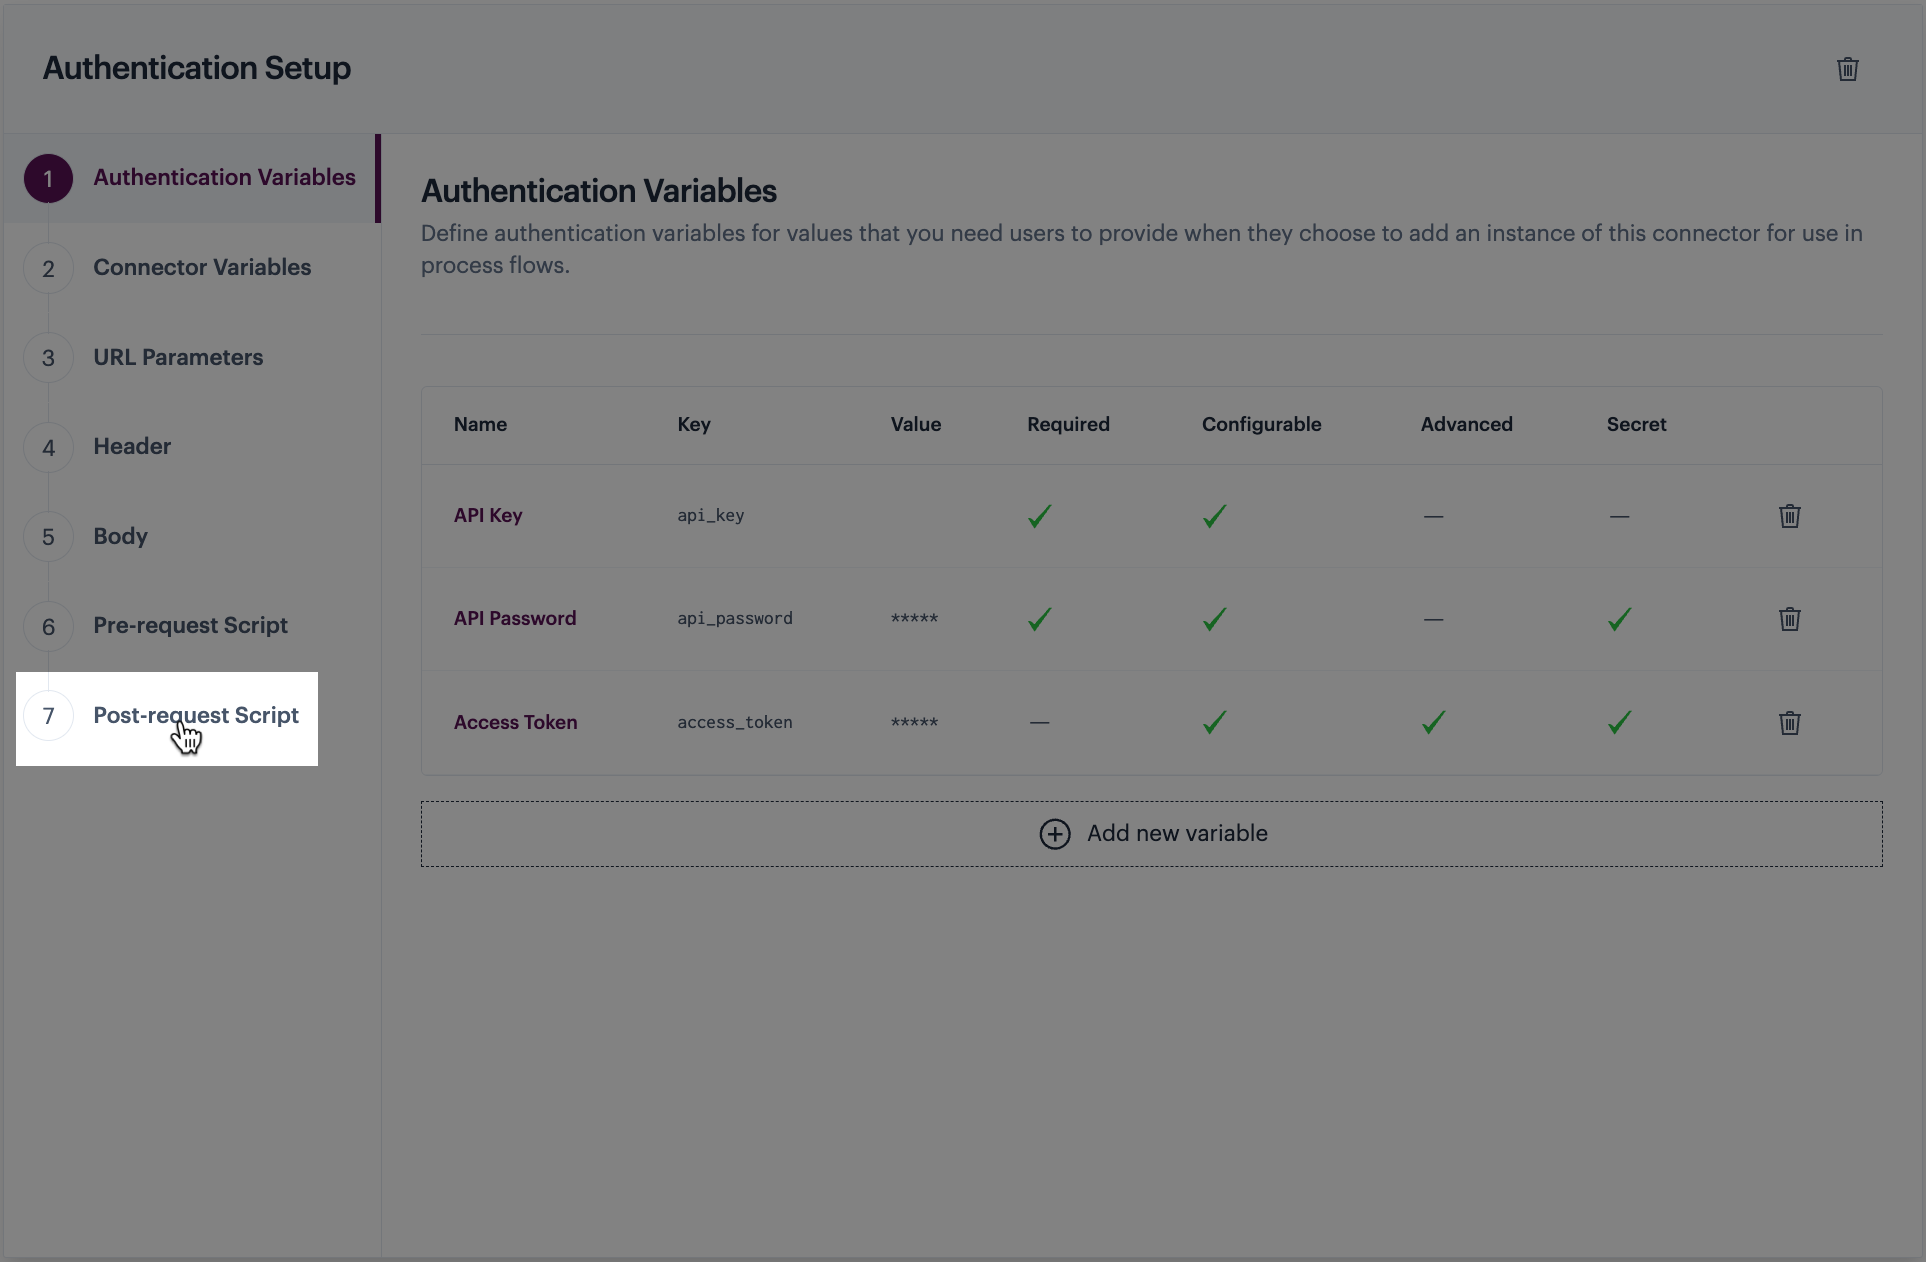
Step 3\ Click the authentication option:

Step 4\ Select the API key authentication method:

Step 5\ In the lower panel, select the post-request script tab:
Step 6\ Click in the select script field and select your Plytix Post-Request Script:

Step 7\ Select the latest version:

Step 8\ Save changes:

Step 9\ You can now add instances of this connector for use in process flows.
Comments
0 comments
Please sign in to leave a comment.